As time marches on, many things improve and evolve, but for those of us who cherish our older cars, maintaining their functionality and charm is a labor of love. One essential aspect of older cars that often requires attention is the window motor. If you find yourself in need of window motor replacement for your vintage vehicle, you’re in the right place. In this article, we’ll explore the importance of restoring functionality through window motor replacement and guide you through the process.
Why Window Motor Replacement Matters for Older Cars
Older cars hold a special place in our hearts. They carry memories of road trips, adventures, and perhaps even a bit of nostalgia. However, as these vehicles age, their components, including the window motor, can start to show signs of wear and tear. That’s when window motor replacement becomes crucial.
- Safety First: Safety should always be a top priority when it comes to your vehicle. Malfunctioning window motors can pose safety risks by preventing windows from closing properly, leaving your car vulnerable to theft or exposure to the elements. Replacing a faulty motor ensures that your windows function as they should, enhancing your car’s security.
- Preservation of Classic Cars: Vintage cars are more than just transportation; they’re a piece of automotive history. Preserving their original design and features is essential for maintaining their value and aesthetic appeal. Replacing a worn-out window motor is a part of that preservation process, keeping your classic car true to its roots.
- Comfort and Convenience: Imagine cruising down the road on a sunny day, and you decide to roll down the window for that classic breeze-in-your-hair experience. But what if the window gets stuck halfway? Not only does it disrupt your comfort, but it can also diminish the pleasure of driving your beloved older car. A functioning window motor ensures your comfort and convenience during every ride.
The Window Motor Replacement Process for Older Cars
Replacing a window motor in an older car is a task that requires some mechanical know-how and a few tools. Here’s a step-by-step guide to help you navigate the process:
Step 1: Gather Your Tools and Materials
Before you start, make sure you have all the necessary tools and materials ready. You’ll need:
- Screwdrivers (both flathead and Phillips)
- Pliers
- Socket set
- Trim panel removal tools
- New window motor (ensure it’s compatible with your vehicle)
- Safety glasses
- Gloves
- Work gloves
- Ratchet and extension
Step 2: Disconnect the Battery
Safety should be your foremost concern. To avoid any electrical mishaps, disconnect the negative terminal of your car’s battery.
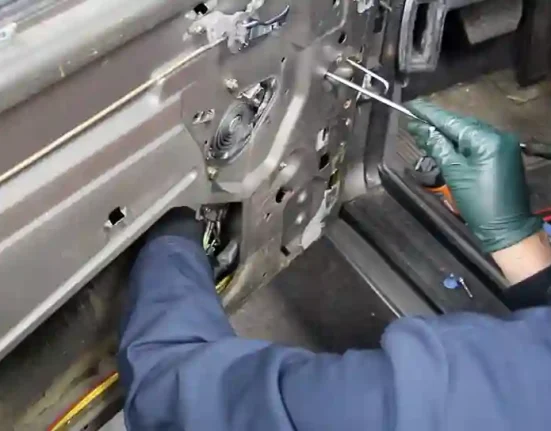
Step 3: Remove the Door Panel
The window motor is housed inside the door panel, so your next step is to remove it. Use your trim panel removal tools to carefully pry off any covers or panels on the door, revealing the screws beneath. Remove these screws using your screwdriver.
Once the screws are out, gently pry the door panel away from the door frame. Be cautious not to damage the panel or any clips holding it in place. Gradually work your way around the panel until it’s entirely detached.
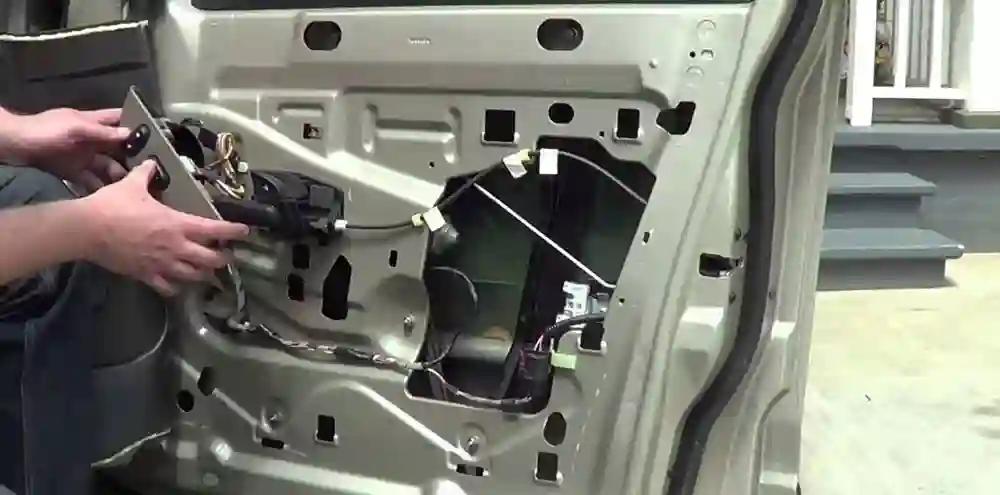
Step 4: Disconnect Wiring and Components
With the door panel removed, you’ll have access to the window motor and its wiring. Locate the electrical connector attached to the motor and disconnect it. Depending on your car’s make and model, you may need to use pliers to release any retaining clips or tabs.
Additionally, if there are other components like door handles or locks attached to the panel, disconnect them as well to make the panel removal process easier.
Step 5: Remove the Window Regulator
The window motor is connected to the window regulator, which controls the movement of the window glass. To access the motor, you’ll need to detach the regulator. Locate the bolts or screws securing it to the door frame and use your socket set to remove them.
Once the regulator is free, carefully maneuver it out of the door, ensuring you don’t damage the window glass in the process. Depending on your vehicle, you may need to lower or raise the window slightly to access and remove the regulator.
Step 6: Replace the Window Motor
Now that you’ve exposed the old window motor, it’s time to remove and replace it. Locate the mounting bolts or screws securing the motor to the door frame and use your socket set to remove them. Carefully remove the old motor and replace it with the new one. Ensure that it’s correctly aligned with the mounting holes and securely fasten it in place with the bolts or screws.
Step 7: Reassemble the Components
With the new motor installed, it’s time to put everything back together. Follow these steps in reverse order:
- Reattach the window regulator to the door frame and secure it with the bolts or screws.
- Reconnect any electrical connectors and components you disconnected earlier.
- Carefully position the door panel back onto the door frame, ensuring that all clips and screws align correctly.
- Reinsert and tighten the screws you removed from the door panel, making sure it’s securely attached.
- Finally, reconnect the negative terminal of your car’s battery.
Step 8: Test the Window
Now that you’ve completed the replacement process, it’s time to test your window motor. Turn the ignition key to the “On” position and try operating the window. If it moves smoothly and without any issues, you’ve successfully replaced your window motor.
Step 9: Final Checks and Adjustments
Before you call it a day, double-check that all components are securely fastened, and the window operates correctly. Make any necessary adjustments or corrections to ensure everything is in perfect working order.
In conclusion, for those who cherish their older cars, maintaining their functionality is a labor of love. Replacing a worn-out window motor is a crucial step in preserving the charm and reliability of your vintage vehicle. By following the steps outlined in this guide, you can restore your car’s window functionality and continue to enjoy the timeless experience of cruising down the road in your classic beauty.